Foodie, Money Mondays, saving money, travel tips

Money Mondays: Don’t Buy Drinks!

Money Mondays is a weekly post about how you can save money without sacrificing your travel dreams.

I can’t believe I only have half a week left of my three month Mediterranean Trek! I will miss seeing foreign countries every day, but I am also looking forward to a change of pace (even if it is pretty much back to the old routine). But even though I’ve been on the road for a long time, I can easily count all the times I paid for a beverage:
-I bought a bottle of Perrier in Paris because I wanted to enjoy the fizzy water in its home country.
-I bought a quart of milk in Barcelona so I would have something to go with my cereal. ( The hostel didn’t provide breakfast.)
-I bought two bottles of Gatorade  in Venice because I got sick and desperately needed that potassium and rehydration salt.
-I bought a slushie in Thessaloniki because buying a drink on a boat would entitle me to a free cruise around the bay.
That’s it.

I guess you could say I technically bought beverages when they were part of a prefixe meal, such as a tapas tour in Madrid or three course meals in Rome. But because these drinks were part of the package, if I had paid for everything else individually, it would have cost more than the price of the meal with beverage included. I think that’s almost like saying I pay for the tea and juice included in a hostel breakfast. I guess in a way I do, but I would be paying the same whether or not I accepted these free drinks.

So what have I been drinking? I occasionally come across a free beverage (last week in Athens, a restaurant offered me a free one to convince me to sit down at one of their tables), and you may remember that I brought some Traditional Medicinals teabags with me. But mostly, I’ve been drinking tap water.

Tap water is safe for Americans to drink in most European countries. Just make sure to look it up ahead of time. Today I’m heading to my final destination, and it’s the only place I’m going with unsafe tap water. I guess I’ll have to buy some water there! The good news is, bottled water is typically pretty cheap in places where you can’t drink the tap.

Needless to say, not paying for beverages can save a lot of money on a trip, and drinking only tap water doesn’t really change the experience. This is also something that can be done prior to your trip, and the savings can go to future travel. How much you’ll end up saving depends on your current habits. If you already mostly just drink tap, it won’t make much of a difference. If you drink a soda every day, consider how much that costs you over the course of a month or a year. If you go to bars, stopping drinking could save you a ton! Also factor in that beverages in restaurants, vending machines, and tourist destinations will probably cost more than at home.

image

Here are some more tips to help you save on beverages:
–  Bring a large refillable bottle. My Camelbak worked well for me on this trip. But these water reservoirs are uncommon in Europe, so I got some weird looks and questions when I drank from its tube!
– Go to street fairs. I’ve been to three on this trip. The first one in Paris provided me with juice, cola, and lots of different food. The second one in Rome scored me milk, juice, bottled water, and Nutella Bready. The third one in Athens provided me with a hat, tee, and pin. If this trip is any indication, then two out of three street fairs will get you free beverages!
– If you really want a beverage, go to a grocery store for the cheapest selection.
– Some restaurants try to sell you bottled water, or may charge for tap. Discuss this with the waiter before you order, and make sure to bring a bottle with you so that you can drink from it if all liquids cost money.
– Look around town for places to refill your water. Oftentimes, if the water is flowing and there’s no sign that says “non potable”, it’s safe to drink.
-For those times when you do have to buy bottled water, buy it in bulk instead of individual bottles. You can always use a big jug to fill smaller bottles, and this translates into less waste and often lower costs!

There are times when it’s more than appropriate to buy a beverage. You don’t want to miss out on a local drink that’s part of the experience. But if you’re addicted to soda or crave coffee, a simple switch to water will improve your health, the environment, and your spending!

What’s your favorite thing to drink? How long do you think you could go without it?

interview, resources, travel tips

Ask Me a Question

I can’t believe my 91-Day Mediterranean Trek is almost complete! In just two weeks, I will experience what will literally be the longest day of my life as I add ten hours to my day while going back to Oregon.

Several of my friends who are inspired to travel have sent me messages saying they have questions for me. Before this trip, I would ask others in various online travel groups for advice and logistic information. Since I realize that answering questions about my personal experience can help multiple people, I decided to have an FAQ on this blog!

image

Go ahead and ask me anything. You can either leave it in a comment below or send a private message to me. At the end of my trip, I will post an FAQ with answers about my Mediterranean Trek!

image

Can’t wait to hear what you have to ask!

image

health, Money Mondays, saving money, Suggestions for the Travel Industry, travel tips

Money Mondays: How Not to Pay for Bathrooms

Money Mondays is a weekly post about how to save money for the things that really matter in life and travel. Enjoy!

image
Would you cross this glass bridge above ancient ruins to use a free bathroom?

I was told that I should set aside part of my daily travel budget for toilet money. In mist areas of Europe, “public” restrooms are privately owned, so if course the pass on the cleaning, maintenance, and utlities expenses to its users. On my last day in Paris, I was waiting for my bus to Madrid and wasn’t sure when I’d see a toilet again, so I paid to use a public restroom. But I’ve since widened up and found more ways to find free bathrooms throughout Europe. I haven’t paid to use a bathroom since!

– Years ago, when on a class trip to the East Coast, a local was taking us on a tour through Central Park. When we came across a restroom, he gave us all a brilliant piece of travel advice that I believe still holds true today: “Go when you can, not when you must.” This is helpful when travelling anywhere, even if it’s just across town, but especially true in countries with bathrooms are sparse and costly. When I see any of the following opportunities, I usually take advantage!

– Know what you’re looking for. Across Europe, bathrooms are marked “WC”, even though nobody actually uses the term “water closet”. If you want to ask someone where the bathroom is, ask “Where are the toilets?” The word toilet is more universal, and someone trying to translate the word bathroom may assume you’re looking for a place to take a bath.

– Unless it’s a historic site where adding a bathroom would cause a compromise in historic integrity, you can expect any place that charges an entrance fee to have free bathrooms inside.

-Restaurants always have bathrooms, except for places that are take-out only. If you’re going to eat out, the restroom is included in your cover charge.

– If you want to use the bathroom at a restaurant or bar but not order food, you can try, but it has risks. Most bathrooms are hidden so that you have to ask staff. If you’re caught, you may be asked to buy something. European McDonalds are particularly clever. Their restrooms can only be opened with a code that’s printed on receipts.

– Take a group tour. I don’t recommend an entire guided vacation, but I like to take walking tours on my first day in a city. Your guide will probably know of places, whether it’s an innovative street toilet or a super touristy restaurant where they let anyone use the facilities.

– Train stations typically charge a hefty toilet fee. Wait until you get on the train, where the toilets are free.

– While many historic churches lack public restrooms, some do have them available. Attending a service in a more modern church building basically guarantees a free commode. (And sometimes even free cookies!) At a small church I visited in Florence, Italy, they announced their weekly office hours just so travelers would know when they could access free bathrooms, air conditioning, and WiFi. Great ministry idea!

– If all else fails, you can always run back to your hostel, provided you’re staying somewhere centrally located!

Hopefully all this toilet talk didn’t gross you out too much, but it can make a big impact on a European travel budget. I’ve seen the charge for toilets range from 50¢ to 2€. If I paid for a toilet just once or twice per day, over my three month trip I would spend about €200 just to use the bathroom! Think of all the great European adventures that can be done for €200 when you think outside the stall!

resources, saving money, Suggestions for the Travel Industry, travel tips

Money Monday: How to Book Your Hostel

Money Monday is a weekly post about ways you can save during your travels. Enjoy!
image

It should be a given that hostels will save individual travelers more money than a hotel would. (Of course there are exceptions. Last spring, I stayed at a hotel in Reno. Out of curiousity I looked up a bed in a Reno hostel, and it was twice the price!) For those of you unfamiliar with hostels, let me give you a brief description: you rent a bed in a dorm room, so you typically end up with roommates from around the world. Hostels are a much more social way to travel, which is especially great for the solo traveler. Plus, since you only book a bed and not an entire room, the hostel charges you less. Huge savings! In fact, my European trip would not have been affordable except for the abundance of great hostels.

So hostels in and of themselves save money, but there are ways to save even more on your hostel. When booking, of course consider whether or not breakfast is included, if you will need to bring your own towel, and little factors like that which could affect the cost. Also consider where you book your hostel. I use a mix of websites to book depending on what is the most advantageous for my bank account. Here are the perks of each:image

Hostelworld This is the most popular hostel booking site. The concept is pretty simple, you find a hostel in their database, pay 10% of the total to hold your place, and pay the other 90% when you arrive at the hostel. It is easy to get acquainted with this, but it is actually one of my least favorite booking sites. Sure, I may go there when they are running a contest or something like that, but Hostelworld does not really have any rewards system for people who book with them. This is why I prefer some of the lesser known booking sites.

Hostelz This has been a longtime favorite of mine. It is not exactly a booking site itself, but it uses several other popular booking sites to find you the cheapest rates. Because it is a culmination of booking sites, it is the biggest hostel database I have found to date. The only downside to this is that it is a little harder to organize the plethora of hostels in big cities and weed it down to the one where you should stay. Some listed hostels are not on any booking sites, which is cool because you can still contact them directly for a bed, but sometimes this means they closed years ago and did not inform Hostelz. The best part of Hostelz is that I write for them! Browse around their website to find my city descriptions and hostel reviews.

HostelsClub This is a hostel that I found out about just before leaving for Europe, and it has been well used over the past several weeks! They are currently running a promotion where if you book so much, you can get free nights at a hotel in Venice. I was able to get two free nights at a centrally located hotel while in Venice thanks to this. The only problem with HostelsClub is that they do charge a service fee for every booking, but that can be avoided by getting a HostelsClub membership. With the membership, you qualify for discounts at some hostels. So my membership paid for itself after just a few nights of booking! Best of all, every time you submit a review after a stay, HostelsClub gives members a 2 euro credit to use when booking future stays. It is almost like getting paid to stay at hostels!

Booking Directly with the Hostel While hostel booking sites are ideal for the long term traveler, any booking deposit you pay online does not actually go to the hostel itself. If you want to support the local economy where you visit, the best thing to do is book directly with the hostel so they can get the most money. This can be done by phone calls, emails, or booking on the website. Sometimes it is difficult to communicate with the staff, or their booking program does not really work. But sometimes, you can get a better deal because of this. While booking the Pisa Hostel, I saved 5% by booking with them as opposed to a booking site. They made a little more, and I saved a little more, so everyone won!image

There is no one best way to make a booking to save money. The important thing to do is compare the above (and any other sites you have found useful) to maximize your travel money!

Money Mondays, resources, saving money, travel tips

Money Mondays: Skip the “Skip the Lines”!

Hello everyone! I’m alive and well in Europe. So far I’ve been to five countries within two months, but I still have two nations and one month left to go. I’m excited to share my experiences with you, but I’ve been packing my days with so much that most of my stories will have to wait until I arrive back in the States. But for now, I’d like to begin a post series called Money Mondays, where I explain one way I save money for or during my travels. Enjoy!

image

I actually began writing this post because I’m waiting in line for a famous museum, and I was getting bombarded by a ton of salespeople trying to sell me skip-the-line tickets. While that sometimes sounds intriguing, these tickets are also four times the cost of what I’ll pay when I do eventually get to the front of this line. Pulling out my phone and working hard seems to make the salespeople leave me alone, and it also is helping to pass the time. If you find yourself stuck in a line and tempted to buy skip-the-line tickets, here are a few other things you can do instead:

-Ahead of time, download a few ebooks to your phone or another device. Just make sure to bring said device with you.

-Pack a lunch (or breakfast or dinner, depending on the time of day) to eat while waiting. When doing this at Disneyland Paris, this actually ended up saving me time since I didn’t have to stop rides for meals!

-Talk with others who are also waiting in line. Give them your insider travel secrets and you may get a few tips in return!

-Pull out your tourist map and plan out your next stops.

-Before getting in line, head to a souvenir store and buy some postcards. Spend the time in line writing letters to all the friends and relatives who expect mail from you!

-Think about how much money you’re saving by not falling for the tourist traps of skipping lines and paying for tours!

But I Have Limited Time!

The ones most likely to buy into skip-the-line tours are the ones who didn’t build enough time into their trip. It’s always best to budget more time than you think you’ll need, but of course there are many factors in life that keep us from always doing this. Here are some timesaving tips I’ve picked up along the way that won’t cost you any extra money.

– At the Eiffel Tower, take the stairs if you are physically able to. It’s only a fraction of the cost of an elevator ticket, and you’ll only wait a few minutes in line. If you can’t walk the steps, make on online reservation well in advance.

– For most other Paris attractions (particularly the Louvre) buy a Paris Museum Pass. Not only does this mean free entry at dozens of locations, but many include skipping the ticket line as well. With my four day pass, I figured I was saving money as long as I went to at least two attractions per day.

– Don’t wait in line to buy a ticket at the Roman Colosseum. Go to Palatino or The Roman Forum, where the lines are short, and purchase a multi attraction ticket.

– Lines fluctuate throughout the day at the attractions connected to Florence’s Duomo. If they’re long, go do something else and come back in a little bit. But make sure to go in line with modest dress and a ticket. Tickets are not sold in the line, so check the posted map for sales locations. And if you come with exposed shoulders or knees, you will be denied entry. If either of these happen to you, you will have wasted a lot of time for nothing.

– At any religious site (specifically cathedrals), if you’re not sure your clothing is modest enough, bring a sarong or scarf that you can cover up with. The guards don’t do modesty checks until you’re at the entrance, so many people wait in line only to be turned away.

– Think about other ways you can save time that won’t cost as much. For example, I typically walk everywhere within a city. But yesterday, there was a lot that I wanted to do, and it would take an hour long walk to get there. Instead of walking there, I took the metro, which was only a fifteen minute trip. That’s like waiting in line for 45 minutes less! Another timesaving idea is to eat fewer meals at sit-down restaurants and opt for street food and takeaway.

– In general, see if you can buy tickets online. Some are the same cost or even less than buying on the spot. However, beware as some online tickets charge an extra service fee!

– While online, see if you can find any information on what days or times are the least busy for the places you want to see. Generally early morning midweek is good, but this can vary depending on the location

.

Above all, know that there will be times you’ll be surprised at how little you wait, and times you’ll be waiting longer than you can imagine. Just remember that lines are part of the travel experience and can be an adventure within themselves. Happy saving!

Accommodations, backpack, Bucket List, destinations, saving money, travel tips

How I Spent Ten Days in Paris (and How I Did It On a Budget!)

It´s time to announce my first stop of my Mediterranean Adventure! I don´t know if you can actually count Paris as Mediterranean, but it has been a place that I´ve always wanted to visit! Here are a few things I did, and also how they didn´t cost me an arm and a leg!

bvj hostel[1]

I Stayed in a Hostel I chose to stay at the BVJ Champs-Elysees Monceau because it was the closest hostel to most of the attractions I wanted to visit. Plus, it was one of the few Parisian hostels that offered free breakfast! Sure, this hostel had its downsides. It was once the mansion of famous Parisian painter Henry Gervais, which was super cool, but the downside of that was that since this historic high-ceiling mansion couldn´t undergo too much remodeling, everything echoed at all hours of day and night. But I think the good definitely outweighed the bad as they offered free detailed city maps, free big breakfasts, free WiFi, and plenty of opportunities to meet other travelers!

DSCF2648[1]

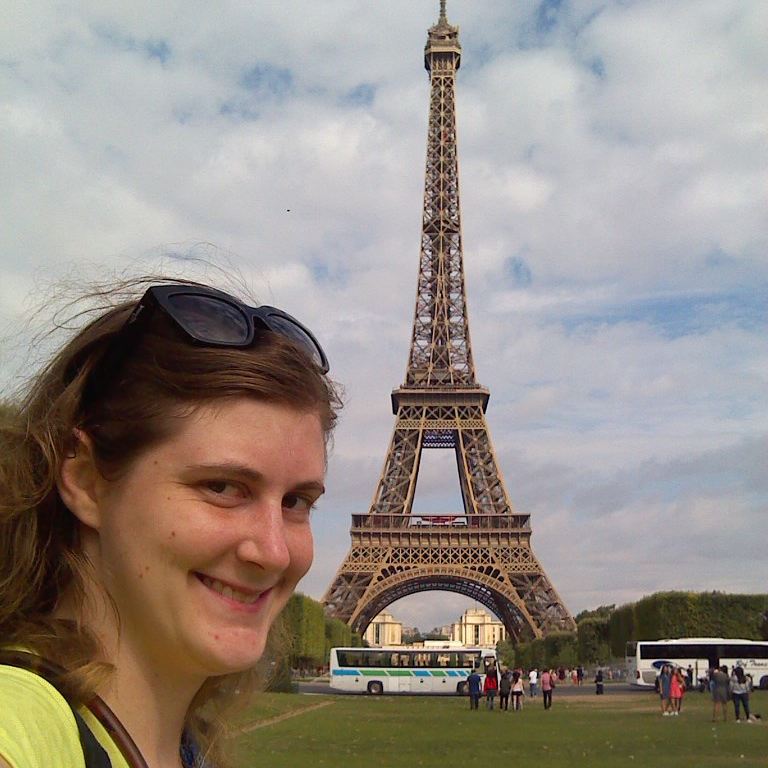
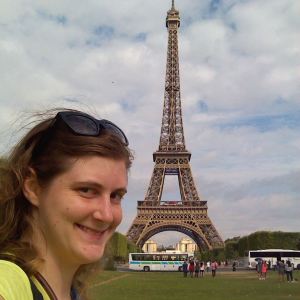
I Climbed the Eiffel Tower I saved hours of time with this by choosing to climb- yes, actually climb- the Eiffel Tower instead of taking the elevator up. The two elevator lines stretched across the entire base at all hours of the day, but the lines for the stairs were virtually non-existent. Not only is this a great way to save time, but it saves money, too. A ticket for the stairs is 5 euros, but after convincing the ticket salesman that I was indeed under 25, I got in for just four. You see the same sights anyway, which are incredible! Plus you sound pretty cool for saying you actually walked up all those steps! The stairs ticket allows you to the first and second levels, but you have to take an elevator to the top level. I chose not to do this. For one, the line to buy this ticket was incredibly long, but also because Paris is so flat, you don´t get to see much more from up there.

IMG_20150722_151217_334[1]

I Smiled at Mona Lisa and Waved at Venus de Milo The Louvre is huge! I spent the first several hours inside the museum simply wandering from room to room and marveling at all I found. But of course, there is one thing that most people come to the Louvre to see. Everyone wants to see Mona Lisa smile! It is totally worth seeing and snapping a selfie with, but beware: it involves waiting in a crowd of hundreds and you really have to push if you ever want to get to the front, where Mona Lisa is several feet away and protected by thick bulletproof glass. By the time the security guard forces you to leave, you are really sweaty, but it´s probably not just your sweat! I am totally glad that I saw her, but I´m okay with never going through that ordeal again!

The other art on my must-see list was the Venus de Milo. There is also a pretty big crowd around this one, but because it is a sculpture, you can see it from all angles. You can also get much closer to her! When I didn´t feel like being in a crowded room, there were plenty of places around the museum where I was the only one around. Eventually, the Louvre outlasted me, and I left much of the museum unseen. So I may go back there someday, but I´ll pass on the Mona Lisa!

IMG_20150723_110734_232[1]

I Saw Vincent Van Gogh and Other Art While the Louvre is great, I preferred the Musee d´Orsay simply because it was less overwhelming. I still got tired at this museum, but this place actually had napping couches! I don´t know if they were intended for napping, but the unique octopus-like couches on the top floor opposite the clock had one-person seats that made you practically lay down, and I was not the only one who took a quick snooze there! But seriously, the art is great. There is a small Statue of Liberty made by the same person as the original, and a self portrait of Vincent Van Gogh!

11264439_1175041762522875_2505788715695467424_n

I Took a Sewer Tour Yes, it smelled. But this was probably the most unique attraction I visited! Paris has a very old sewer and water system, and it´s amazing that it was created progressive enough to hold up all these years. Plus, I´m really thankful that Paris has this so that the Seine is no longer full of waste!

I should mention how I could afford all these museums and attractions. I actually did not pay an admission fee for anything in the city other than the Eiffel Tower! The rest was covered by my Paris Museum Pass. I picked up a four-day pass for €55 at the airport´s visitor center. They also sell passes for two or six days, but I found four days to be the perfect amount. I got to do everything on my must-see list, plus I had a little time to discover little-known features, such as the sewer! As a bonus, the pass allows you to skip the line at most attractions, especially beneficial for long lines at popular places like the Louvre!

10647206_1170749826285402_6965461079037259166_n

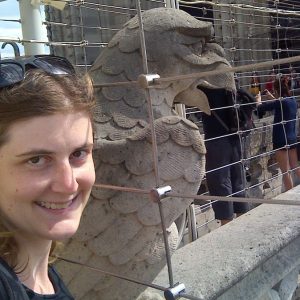
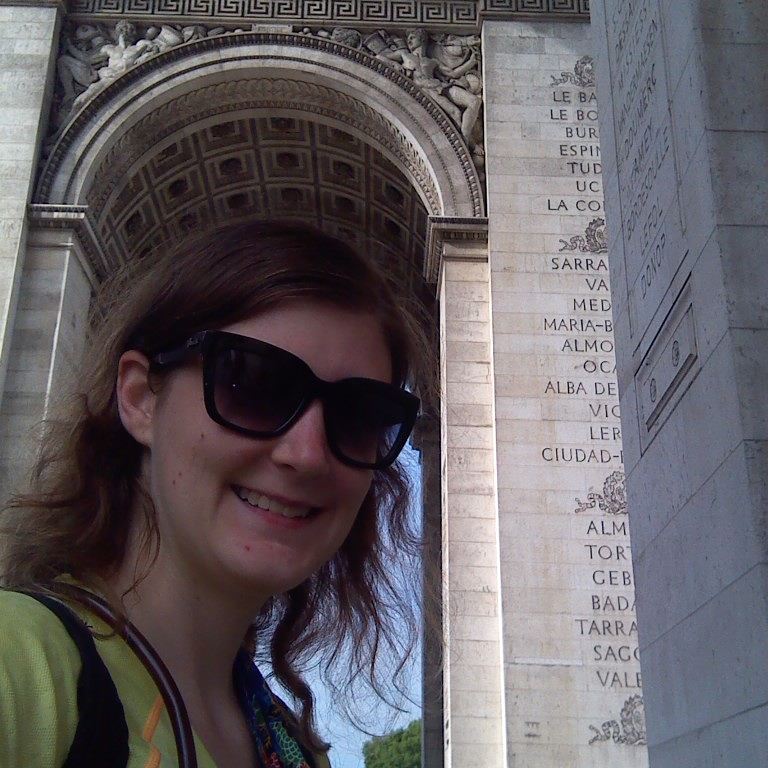
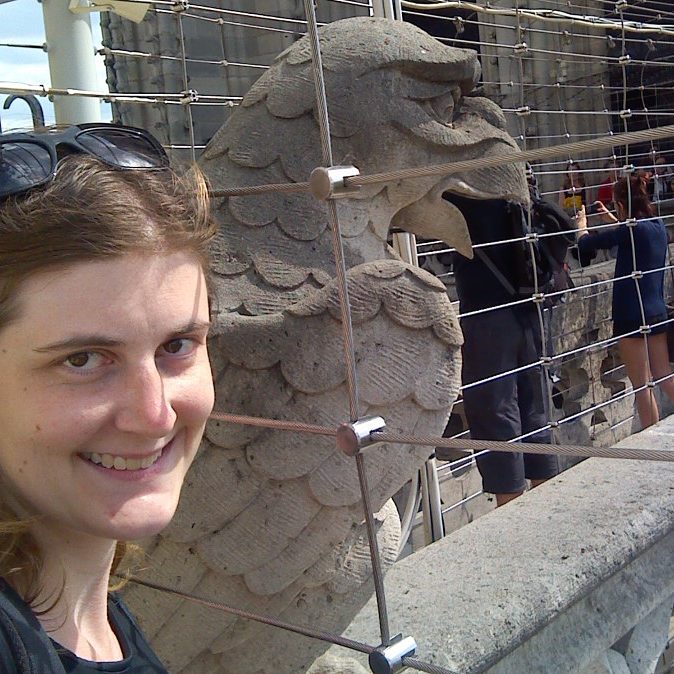
I Hung Out at the Arc de Triomphe I think the best views of Paris are not found from the Eiffel Tower, but rather from the top of the Arc de Triomphe. The Arc is situated in the center of the largest roundabout you´ve ever seen! But I didn´t have to worry about crossing this nearly lawless route. There is an underground tunnel at the end of the Champs Elysees that goes under all that traffic and ends up at the base of the Arc de Triomphe. It´s free to stroll around the base or admire the Tomb of the Unknown Soldier. You can buy a ticket to take the long spiral staircase to the top, or just wave the Museum Pass and get in for no extra cost.

DSCF2505[1]

I Strolled the Champs-Elysees (and learned how to pronounce it!) This could be an expensive endeavor if you don´t do it right. I did spend a little money at two different places. The first shop I bought from was McDonald´s, of all things! But this McDonald´s has a special McCafe where you can get what I think are the best macarons in Paris. I know this because I also bought a raspberry macaron from Laduree and did a comparison.

Besides sampling the local cuisine, my favorite thing to do on the Champs Elysees was visit the multiple auto showrooms. Even if you aren´t that interested in cars, these places are a sight to see. One showroom had movie cars from Jurassic World. Another had an attraction that gave you the illusion that you were standing on the ledge of a skyscraper! A couple of them offered free photo booths. Other favorite places to window shop at included Sephora, A&F, and The Disney Store. As long as you´re just marveling at the size of the store and not picking up items to buy, the Champs Elysees can be an inexpensive experience!

DSCF2557[1]

I Took Two Guided Tours Using a walking tour company called DiscoveryWalks, I had the opportunity to explore the Notre Dame and Montmarte regions very in-depth. The local tour guides will tell you secrets and show you places you won´t find in any guidebook! They also give you practical tips, like where to fill up your water bottle for free. (The green fountains aren´t just for decoration!) The DiscoveryWalks tours I chose were tip-based. After how wonderful both guides were, I wished I had brought more money in my daypack to tip with! The only thing that these guides (both male) weren´t good at was rocking the company´s pink vest. They both expressed how awful the color was and took it off as soon as the tour begin. Maybe sometime down the road, DiscoveryWalks can adopt a more masculine color!

11224217_1173973882629663_6718256037408334639_n

I Saw Notre Dame from Top to Bottom Most people want to visit the top of the Notre Dame because they know Quasimodo had great views. Some people go inside the free cathedral. Even fewer explore the depths below that show the remains of an ancient city. I actually didn´t know that crypt existed until I saw it listed on my Paris Museum Pass! I did have to wait in line for about an hour to get inside the stairwell that goes to the bell tower. I think it was worth seeing the bells up close, and getting a completely different view of the city. But I think my favorite part was going inside the actual cathedral. It looks like a long line to get inside, but it moves quickly. Inside you´ll find lots of art and relics, most of which you can photograph! And for those of you who have watched the Disney cartoon, I do have to tell you this: as I was walking off the island that Notre Dame is situated on for the last time, I realized that I had completely missed my opportunity to yell “SANCTUARY!” So if any of you go there, will you do me a favor and shout that for me?

DSCF2619[1]

I Visited Other Historic Cathedrals, Too I probably could have spent my entire time in Paris just cathedral hopping! Actually, I´ll probably visit lots of cathedrals throughout Europe if they´re half as good as the ones in Paris. As wonderful as the inside of Notre Dame was, it wasn´t nearly as exquisite of that of Sacre Couer. I also attended mass twice in Paris, once at Notre Dame, and once at a little historic cathedral on the same hill as Sacre Couer whose name escapes me. I´m not Catholic, and I don´t speak French, so I was pretty lost during both French-speaking Catholic masses, but the people there are very welcoming of everyone. It´s also easy to take a hint from everyone around you if you sit in the middle or the back of the sanctuary and just stand, sit, or kneel when everyone else does. You could try to sing or respond with everyone else if you´re ambitious. Even when I had the words in front of me, I usually ended up just moving my lips.

IMG_20150724_195627_496[1]

I Relaxed Like a Parisian at the Parcs There are so many parcs in Paris! Of course, the most popular ones among travelers are those surrounding the Eiffel Tower. But after getting tired of being asked to sign fake petitions there, I went out and explored the other parcs. In these parcs, you´ll see the locals getting together and lingering over a picnic. At one parc, I sat down to eat a crepe nearby a group of young Parisians. After I finished, I walked around the Sacre Couer, walked down to Moulin Rouge, met up with a DiscoverWalks group, toured with them for nearly two hours, and ended up at the same parc I had eaten lunch at. Guess what? That same group of Parisians was STILL THERE enjoying lunch!

DSCF2610[1]

I Ate a Lot of Crepes Other foods consumed included quiche, baguettes, and croissants, but my favorite was definitely crepes. There are street vendors all over Paris who sell these wonderful creations, and they can be eaten for snack, dessert, or even a meal! My favorite spread on the crepes was Nutella, but the cheese was also delicious. I tried to buy crepes from vendors who would pour out crepe batter and cook the crepe right in front of me. There was just something more authentic to that than eating the mass-produced packaged crepes.

I ate a crepe on most days, but there were also a few times when I went grocery shopping. That was an experience in itself! My favorite store ended up being a chain called Monoprix. They bake their bread and pastries right there in the store. If you buy a food that needs to be heated, you can even use their microwave! I mostly just bought Nutella and produce.

DSCF2744[1]

I Went to Disneyland Paris It´s the most magical place on Earth! Well, it is in Europe at least. After going to all the Disney parks in the United States (save for California Adventure), I wanted to live as a Disney fan in another country. Disneyland Paris consists of two parks: the classic Disneyland, and Walt Disney Studios, which is most like the Hollywood Studios park in Florida.

You may be wondering how Disneyland  could possibly fit into budget Paris. A day at Disneyland Paris is actually cheaper than a day at the original Disneyland. I wanted to get a Disneyland Paris Express ticket. Not only does this include entrance into both parks, but also offers bussing to and from several locations in Paris. If you live in the USA, you can buy one of these tickets online for $135. But when I went on the French version of their website, I noticed that they sold this same ticket for €99. That´s a lot cheaper! In order to get the lower price, I used the French version (translated into English, of course) and entered my hostel information when it asked for an address. You print the ticket from your e-mail anyway, so it doesn´t really matter what you enter for the address. After I bought this, I didn´t buy anything else from Disneyland. I brought my own snacks to sustain me, and I even got a free souvenir by asking at Guest Relations!

11696001_1170751779618540_7467350007981491791_n

I Took the Plane, Bus, and Subway I didn´t take the subway until my very last day, when I had very few other options to get to the bus station. I was a little nervous since it was my first time riding any subway. I was confused when buying the ticket and had to get some help, but after that, it was almost as if I´d been riding the metro for years! It´s only €1.80 for most of Paris. Places outside of the city limits, like the airport and Disneyland, do cost more. To save money coming into Paris from CDG, I found a bus service called EasyBus, which is the absolute cheapest way to get from the airport into Paris! I also took the Disneyland Paris Express bus to get to and from Disneyland. But other than that, I did everything on foot. Yes, it was exhausting, especially considering Paris´ unexpected heat wave. However, this way I was able to experience so much more of Paris that most tourists miss! It saved a few Euros to boot!

11144788_1175610789132639_9107614948131680921_n

I Saw the Last Leg of Le Tour de France! When I found out when Le Tour ended, I decided to stretch my time in Paris just so I could catch it.I was curious what the best place to watch it from was. I even asked on traveler forums, and most people responded with snotty things like “just watch it on TV” or “the best place to see it from is inside your hotel room”. NO! It was absolutely amazing to see it from nearby the Arc de Triomphe. It was amazing just in itself to see that roundabout free from traffic! But seeing a bunch of guys bike around the Arc several times is not all that there is to do. Before the final stretch begins, there is a women´s version of Le Tour de France, which is just as exciting to watch. Between races, there is a sponsor parade with some pretty crazy vehicles! And during Le Tour, when you can´t see the cyclists in person, there are several screens situated around that stream the race live. However, I think my favorite part was going through the street fair. Companies were giving away delicious samples like crepes, oysters, fruit, breads, and Paris Cola. I shouldn´t have even bothered to pack a lunch!

Just so you know, I was not sponsored or comped for anything I did in Paris. I had to fund all my time in Paris completely on my own. If I can conquer Paris on a budget, I know that you can, too!

resources, souvenir, travel tips, writing

Top Ten Tips for Taking a Travel Journal

image

For many of my past trips, I have taken along a travel journal. But will I take one on this upcoming trip? Journals are heavy, and three months is a long time to keep consistent in writing. But my new travel journal will not leave my side as I trek across Europe! If you are planning a trip, I have some advice as to why you should include a journal.

1. My journals are the most meaningful mementos of any travel. They remind me of many emotions and experiences that I may have otherwise forgotten, whereas souvenirs often only remind me about my experience at the shop. Plus, since you bring your travel journal at the beginning of a trip, it’s the only souvenir that won’t add pack weight as you go!

image

2. If you aren’t into writing, don’t assume journaling isn’t for you. Some journals come with unlined pages, perfect for those who prefer to doodle. You could also have others write your journal for you. Just ask those you meet on your trip if they would leave a note in your book so that you can remember them. My journal has a pocket in the back cover that I use to collect notes, tea and candy wrappers, ticket stubs, and other small mementos. Some travelers bring a glue stick along with them and use these sorts of items to create an on-the-go scrapbook in lieu of a journal.

3. Don’t feel pressured to write every day. On transport days, it’s hard to come up with an entire page of how interesting it is to sit on a bus. I’ve often combined two travel days into one journal entry (often a busy day where I didn’t have time to write followed by a boring day of just getting to the next place). I still include the slow days in my journal because they’re still part of my journey and usually something notable happens, but you can skip days like these entirely if you choose.

4. Decide if your journal pages will be shared, or if they are for your eyes only. I never really thought about this until last summer when I was speaking with a Japanese traveler who wanted to practice his English. When he asked to look at the journal on my lap, I hesitated, but figured that he wouldn’t be able to understand most of it, and I was never going to see him again anyway. Since then, I have shared a few entries on this site, but I think many entries only display their full meaning to the one who wrote it.

image

5. Remember that there is no pressure to fill up every page of your travel journal. My most recently used journal is filled with trips from the past several years (2009-2014), and it still has some pages to go. I actually like the blank pages at the end. They’re inspiration for future trips. Or you can leave those last pages eternally blank and start a new journal every trip.OR, you can turn your travel journal into a daily journal and write about your adventures at home. It is your journal, so do with it whatever you want.

6. This may only be for people like me who can’t stand improper spelling, but when you look back on your entries, resist the urge to correct any errors. that journal entry was written in its time just the way it is, and trying to change that is like trying to change history. Leave it be! That being said, when you are writing in your journal, make an effort to use proper spelling, grammar, and punctuation. Your future self will thank you for it!

6. Use your journaling time to relax from your journey. I often incorporate journaling into my on-the-road bedtime routine. I’ve also journaled at a park or other place where I can write while lingering by a view. Having a journal is also a good way to look less creepy when people-watching. If someone looks your way, simply get really involved in your writing!

7. I try to bring along a medium-sized journal because it’s big enough to hold everything I want to write, but still light enough to carry around. I sometimes even carry it in my day pack when I go walking for the day. That way, it’s ready to go whenever or wherever I’m inspired to write.

image

8. You can use your journaling time to also practice your faith. You could write a prayer journal if you desire. My last two journals have had scripture pre-printed on each page. Sometimes, when I get out my journal, I’ll also get out my Bible as well. Journaling tends to mentally and spiritually place me in a position where I am very open to prayer and meditation. Find out what works for you.

9. Back when I was in high school, for the few trips I journaled for, I just used a spiral notebook. I guess it served its purpose, and I still have those stored, but they’re definitely lacking something. I would say the same thing about computerized journals as well. Beautifully laid out pages make the writing experience more enjoyable. A ribbon bookmark helps you keep your place. And a hard cover makes a journal durable for any trek it comes across. I got all these features when my grandma gave me an Ellie Claire travel journal. I have used it over the past several years, but when I realized I was running out of pages for my upcoming trip, I went straight to Ellie Claire for another one! My new journal has an updated look, but still includes all my must-have features!

I still need a tip number ten! Do you keep a travel journal? What advice can you share?

image

Thanks Ellie Claire for sponsoring my new travel journal! All opinions expressed are my own, and I was loving Ellie Claire long before they partnered with this website!

backpack, travel tips

Taking a Practice Walk

image
Pardon the mirror selfie, but I wanted to show off my pack after my test walk.

Before a road trip, you always make sure that the car is ready for such an endeavor, right? It’s a good idea to get the main mode of transportation ready for a backpacking trip, too. And for my upcoming trip, that transportation would be… me!

I have worn my backpack a bit around the house, but yesterday I decided to take it to the streets. Except for a few small items, my backpack is completely packed. It weighs a little over 20 pounds. I wonder what the neighbors thought as I walked down the road with this big ol’ thing on my back! Was I running away? Did I think this rural area was for tourists?

I ended up walking about a half mile. I returned home sweating, but I think that was mostly due to this triple-digit Oregon summer. Regardless, I’m still glad that I sprung for a hybrid backpack with wheels. My first walk in Europe will be over two miles!

Do you “practice” for anything before taking a trip?

Carry-On Toiletries, health, travel tips

Making Liquids TSA-Friendly

If you’ve flown at all in the past ten years, you’re probably familiar with the rule for liquid carry-ons: you can fill a one-quart or one-liter plastic zip bag with containers no larger than 3.4 fluid ounces (100 mL). With this kind of restriction, is it really possible to take all your toiletries without checking your luggage? I am, and I’ll be gone for three months! Here’s how I’m making it happen:

Toothpaste

3oz toothpaste

A lot of toothpaste tubes are actually perfectly fine to take in your carry-on. Remember that the TSA limit for liquid carry-ons is 3.4 ounces (100 milliliters)- that’s a lot bigger than most things labeled as “travel-sized”! If you’re going on a week-long trip, one of the free sample-sized tubes that they give out at the dentist office will work fine. (If you run out of toothpaste early, cut open the tube for about an extra day’s worth of toothpaste.) If you need more toothpaste for longer trips or because you’ll share with others, look among the normal-sized toothpaste instead of the travel section. I found a three-ounce tube, so I’m set!

Soap

dr bronners soap

Many travelers swear by Dr. Bronner’s Castille Soap. I do take a small bottle on most of my trips because it the condensed formula lasts a long time, but it’s not exactly my favorite. I don’t use Dr. Bronner’s at home because it’s not as effective as other soaps and tends to leave a residue, especially when being used as a shampoo substitute. Instead, I use my Dr. Bronner’s once every few days and supplement with a solid bar of soap. The kind I use, both at-home and on-the-road, is a natural oil-based soap made by a company that gave me extras since I was the last customer just before it went out of business. So while I unfortunately can’t recommend a specific kind of bar soap (and I’ll sadly have to find another supplier when I run out of my last few bars), there are plenty of bar soaps out there for you to find one that perfectly suits your needs. I bring a family-size bar and cut it into chunks as I go so that only one small piece is wet. As a bonus, soap bars are like an air freshener for your suitcase!

Insect Repellent

009 012

If you like to use the aerosol cans of bug repellent, it could be confiscated, even from checked luggage. I prefer to use DEET-free spray, comes in a spray bottle instead. I wanted to use up my almost-full bottle of spray that I currently had, but when I checked the label, it was marked as four ounces. Yes, I think companies purposefully make four-ounce bottles a better deal so they can charge you extra when you have to go back and buy a 3.4-ounce bottle! Instead of paying for an extra bottle of repellent, I instead decided to pour it into a travel-sized bottle. I do this with other liquids all the time, but this was the first time doing so with a spray bottle. Sure, I could just pour it into an ordinary bottle and rub the repellent on like a lotion, but I’m pretty sure it’s sold as a spray because that’s the way it’s most effective. Fortunately, I had a travel bottle that had the same exact size of opening as the original bottle, so I could just pop the original spray mechanism on the new bottle. Since this bottle was smaller, I had to trim down the hose so that the lid would fit on. Because I was afraid this might leak, I cut a small circle of plastic, poked a hole in the center, and slid it onto the hose before twisting the bottle shut. (You can put a piece of plastic underneath any liquid lid to prevent leaks, but unless it has a hose like it did in this case, you’ll have to remove it before you use it.) I also put a piece of cotton next to the nozzle to absorb any leaks, but so far not a single drop has leaked, and I packed this over a week ago!

Sunscreen

sunscreen

For my eighteenth birthday, a friend gave me a Mary Kay travel kit for my birthday, which included two small empty bottles that I could fill with my own liquids. However, my bottles have outlasted their production, because Mary Kay no longer sells these. (But I recently found another brand of bottle, and I may like it even better. Just keep reading for a few more sentences and you’ll find out what it is!) For the past several years, these bottles have been filled with things like shampoo, conditioner, soap, and even liquid deodorant at one point in time. I think this is my first time packing sunscreen in them, though.

Since I burn easily and will be outside quite a bit, perhaps one small bottle of sunscreen won’t be enough. I recently bought a sunscreen stick to supplement this liquid. I found it at an outdoor supply store in the fisherman’s section. Of course, hats and sleeved shirts help keep the harmful rays away, too!

Shampoo

gotoob shampoo

Many travelers don’t take shampoo at all since it’s provided in just about every single hotel room on the face of the planet. But some people have a specific brand that works best for them. And hostels are usually a toss-up in whether or not they provide shampoo. Plus there are other forms of accommodation, like camping and rentals where you definitely shouldn’t count on this. So while I’ll always jump at the opportunity to use free shampoo and conditioner, I am bringing something for those times when it’s not around.

Now I can share my latest discovery in the world of traveling with liquids! I recently got a GoToob, and it’s filled with a shampoo and conditioner combo to start out my trip. These are travel bottles made out of silicone, which means more flexibility and less possibility of damage. (But if they are damaged, they’re covered by a lifetime warranty!) While I still love my plastic bottles and will continue to use them for liquids that aren’t silicone-compatible, GoToobs are my new go-to travel bottle, and I don’t see myself pouring shampoo into any other container! Although the bottle size ranges up to 3 fluid ounces, I downsized to just two ounces because that bottle includes a suction cup, perfect for sticking on the wall of a shower that lacks soap dishes! And since GoToobs are food-safe, towards the end of my trip I may wash out the remaining shampoo and fill it with a delicious Greek or Turkish condiment to take home with me! As I travel, I will compare the silicone GoToob to its plastic counterparts and keep you updated on which works better!

Laundry Detergent

homemade laundry powder

When I read about other long-term carry-on-only travelers discussing how they pack sample-sized detergent, I have to laugh. They do know laundry soap comes in powder form too, right?

Even if you’re hand-washing, as long as you use warm water, powder soap will dissolve enough to be just as effective as liquid. The only problem with laundry powder is that it tends to look… well, suspicious! I don’t pack any kind of powder in a plastic baggie, since people automatically think “drugs” when it’s packaged like that. I put it into Snapware containers and make sure it’s clearly labeled. Technically, anything that you repackage needs to be labeled, but at least with most things you can tell what it is by sight and smell. Since powders look suspiciously like something else, it would be suspicious for a TSA agent to get close enough to smell what it is!

By the way, I bring a homemade laundry soap that’s so condensed, only one tablespoon is needed for a full load. You can find recipes like this online, but I’ve made a few tweaks for maximum effectiveness and traveler-friendliness. Would anyone be interested in getting the recipe for this or any of my other homemade travel toiletries?

Other Liquids to Take

tsa quart liquid bag

I got a free sample-sized bottle of mouthwash that I’m taking with me, but if you don’t have room or don’t want to buy a miniature bottle, this certainly isn’t a necessity. I am also bringing along tea tree oil. These typically come in small bottles anyway, so there’s no need to transfer packaging or look for something specifically travel-sized. The most important liquid might be hand sanitizer! I’ve been carrying the same little bottle around for over a year and can easily refill it from larger bottles of hand sanitizer. Hey, with as popular as hand sanitizer is, it can even be refilled for free along the road by using sanitizer stations at schools, hotels, and other public places. All together, all the liquids easily fit into the TSA carry-on-approved one-quart bag!

This post was made possible by HumanGear, the newest sponsor of the Mediterranean European Trek! They provided products to use on my trip, but all opinions are my own. Stay tuned for more of my thoughts on different HumanGear products!

resources, travel tips

What’s Your Go-To Travel Gear?

Do you have any travel gear that you can’t leave home without?

A few weeks ago, I was at the yearly yard sale for a local outdoor store. I was hoping to find some good deals on gear to take with me when I travel. Not only did I find that, I found Lewis N. Clark!

014

Lewis N. Clark has just about everything a traveler would need, whether a thru-trail hiker or an urban adventurer. At the sale, I picked up several of their products, including a side release buckle strap (to keep contents of my bag in one place) and a dual converter kit (to safely charge my electronics). Later at home, I went onto the website and found dozens more Lewis N. Clark products that my store didn’t have!

I was excitedly anticipating the day that my box from Lewis N. Clark would arrive. The delivery truck just couldn’t come fast enough! When it finally did come, I tore open the package to find the following:

Lewis N Clark folding brush with mirror

Folding Brush with Mirror– My current hairbrush is almost the size of my entire forearm! There’s no way that would be practical for living three months out of a carry-on bag! I considered taking a flat, wide-tooth comb until I found out that Lewis N. Clark has this folding brush with mirror! The bristles and mirrored-handle fold in, making this easy to fit in your pocket or the palm of your hand. I remember having a travel brush similar to this when I was a kid, but it was a cheap version and every time I folded it, more bristles popped off. The Lewis N. Clark brand is a much better quality made with more durable materials, so I have no worries with this being my only hairbrush for three months!

016

CamPack Towel– I have to admit, I have been eyeing those super-absorbent compact travel towels for a long, long time! For the past several years, whenever I needed to take a towel on a trip, I would bring either a hand towel or a turban towel, and just use that after showering. While that took up less space in my suitcase than a normal towel, it took them a long time to dry, and I would sometimes have to transport a partially-moist towel that would end up making everything in my suitcase smell a bit akin to mildew. I’m excited to have the CamPack Towel now because not only are they quick-drying, but they take up only a tiny bit of suitcase space- much less than even a hand towel! In fact, it doesn’t have to take up any suitcase space since it comes with a bag and carabiner that I can clip to the outside of my backpack. I got the blue towel that’s medium-sized, and noticed that, when folded in half diagonally, it makes a decent headband, too!

018

Latex Clothesline– In most of my extended travel (meaning about two weeks usually), I would stay with a friend or relative for at least a couple days, and I would just do my laundry using their washer and dryer. With shorter trips, I’ve simply been able to pack enough clothes for the entire trip. I don’t know many people living in Europe, and I certainly can’t take three month’s worth of clean clothes with me! (I don’t even have that many outfits!) I may use a laundromat or a hostel coin-operated machine a time or two on my trip, but those can be expensive and I would much rather spend my money on more adventurous endeavors. To keep clean and save money, I will wash my clothes in the sink or shower using my condensed homemade laundry powder, wring them out, and then hang them on this latex clothesline, which can be strung outside, in the bathroom, or across my bunk. And I don’t have to waste precious suitcase space by bringing clothespins. The braided latex will pinch clothes into place. When combined with my moisture-wicking and quick-drying clothing, I won’t have to worry about wet OR smelly clothes!

017

No-Jet-Lag– This is not a Lewis N. Clark product, but parent company LCI Brands also distributes No-Jet-Lag. These natural-ingredient pills claim that when taken on flight days, they can remedy one of the biggest problems that can spoil a long-distance trip. I’ve never jumped more than three time zones at a time while traveling, but even a couple hours difference takes some getting adjusted to. With a nine-hour difference on the way there, and a ten-hour difference on the way back, I will really be putting No-Jet-Lag to the test! While I haven’t tried it yet, I’m sure that twenty-five years of positive reviews means that it really works!

Make sure to check back here during my trip so you can see how this travel gear is working for me. But until then, why don’t you try it out for yourself? You have the opportunity to win a Travel Prize Pack containing these four items in this CONTEST! Edit: Congratulations to the winners who were notified 21st of June, 2015! 

011

Lewis N. Clark provided No-Jet-Lag, CamPack Towels, Latex Clotheslines, and Folding Brushes with Mirror for the purpose of review and giveaway. All opinions for these and other mentioned items are my own.