Accommodations, culture, destinations, Foodie, Hawaii, hike, resources, saving money, souvenir, Things to Do, tour, travel tips, Walk

How to Vacation in Maui on the Cheap

Hawaii is known as an expensive vacation destination, and the island of Maui is no exception. However, my sister and I recently returned from eight nights on this tropical paradise, and we did it on a budget! If you’d like to see Maui, Hawaii without the typical price tag, take a few of our tips.

(Note: Although we did get good deals on our flights, airline tickets involve too many factors, such as season, origin, and personal resources. I’ve decided that, because all the variables that went into our flights probably can’t transfer to yours, to leave this expense out. If you want to save money on flights, there are plenty of articles out there dedicated to just that!)

Some links are affiliates. All links are personally recommended by me!

Gear

For the most part, I just used what I already owned to pack my bag. In Hawaii, you can wear shorts and swimsuits year-round, but I also packed a rain jacket for the unpredictable weather changes as well as leggings and a long-sleeve because I wanted to hike Haleakala with its cold summit. Since most of the clothes were compact, it was easy to fit everything into carry-on luggage and not have to pay for a checked bag.

One thing I did need to buy was razors. I ordered a starter pack from Dollar Shave Club, which included a handle, four blades, and some travel-sized toiletries, all for $5. Better yet, I took advantage of a Dollar Shave Club deal on Swagbucks, so I was paid back in rebates.

One item I knew I’d need, but didn’t have was a snorkel. I decided to just rent one in Hawaii. However, before going to the snorkel rental shop, we stopped at a grocery store. There I found snorkels for the same price as a one-day rental. Since my sister and I both knew we’d be snorkeling multiple days, we bought these and made our money back with our first swim. I snorkeled a total of three days and saw some incredible sea life, making it a worthwhile purchase.

Accommodation

We rented dorm beds at Maui’s Banana Bungalow Hostel. This was by far our biggest expense on the island, and one of the most expensive hostels I’ve ever stayed at. But the $51.40 per night was much more reasonable than any Maui resort or vacation home. I suppose the only cheaper option would be camping, but that is only available in remote areas, and I wanted to be close to the action. Plus, the hostel offered more than just a bed to sleep on. Banana Bungalow provided other money-saving measures that I’ll explain through the rest of this post.

Check out other affordable Maui accommodations on Airbnb… and get $40 off your stay by using this link!

Transportation

While most Maui vacationers rent a car, here’s our big money-saving secret: we didn’t drive at all! The main reason I chose to stay at Banana Bungalow was because they offer different tours to different parts of the island each day of the week. I ended up going with them to several famous beaches, Haleakala National Park, and even the Road to Hana. Of course, the drivers/guides work for tips, but these tours were worth more than pricey commercial tours.

Since Banana Bungalow is near downtown Wailuku, we simply walked to town to eat good food and see some incredible sites. Iao Valley is in the rainforest about three miles outside of the city, so we hiked there one day. For other excursions that we took on our own, we utilized Uber and Lyft. As it was our first time using these rideshare apps, we got registration bonuses, and I also used my Swagbucks to get a free $25 Uber gift card. We would just compare prices between Uber and Lyft and go with whatever was cheapest for our situation. (Use Uber promo code jessical42262ue to get a $15 Uber ride for free! For Lyft, use promo code LIPPE15551 for a special discount.)

Activities

Thankfully, most of Maui’s attractions don’t cost a dime. All beaches are open to the public. Swimming is free. Hammocking is free. Hiking is free. Most parks are free. With the Banana Bungalow tours, we didn’t even have to pay for gas or parking. The only activity expense I had with these tours besides tip money was the national park entry fee into Haleakala.

Since my sister’s birthday was in the middle of our trip, we decided to celebrate at Maui Tropical Plantation. We originally weren’t going to take the tour and instead enjoy the free botanical walking paths and my gift to her would be a meal at the restaurant. But then we changed our minds on the restaurant and decided to eat from the less costly coffee and ice cream shops, so then my birthday gift to her was paying for the tram tour. It was $20 per person and included lots of sights, information, and fruit!

Food

Admittedly, this was the most difficult category to keep on a budget, and I definitely made a few splurges. Most food in Hawaii is expensive, so I didn’t want to be paying exorbitant prices for the same food I eat at home. I also wanted opportunities to taste local cuisine. However, I did pack a variety of snacks so that I didn’t have to buy food in airports, and I used these snacks to supplement a couple of meals in Hawaii as well.

The hostel offered make-your-own pancakes every morning, so breakfast was covered. Often while cooking in the communal kitchen, others would make food and offer leftovers to everyone. There were even free shelves in the fridge and pantry, so that provided a few ingredients.

The tours stopped at grocery stores such as Safeway and Foodland so we could load up on reasonably-priced food. These stores have local, grown-in-Hawaii produce sections, so I focused my shopping there. We also bought fresh fruit at Maui Tropical Plantation’s market and packaged goods at an Asian market down the street from our hostel. We even got food at Costco. The restaurant menu had some different choices from our local Costco, but still had $1.99 pizza and $1.50 hot dogs!

We did go out to eat several times, but not to fancy sit-down restaurants. We happened to be in Wailuku during their First Friday street fair, so we loaded up on all kinds of local cuisine from the various food stands and trucks. We ate at food trucks and stands a couple other times, like on the Road to Hana where we split a roadside meal served on a banana leaf. (We passed on the banana bread when we realized it was from a bakery a block away from our hostel. We walked there the next morning and got the banana bread for a fraction of the price!) We also ate at a few walk-up restaurants. We even ate at McDonald’s, but I only ordered off their unique local menu. Spam and eggs, anyone?

Shopping

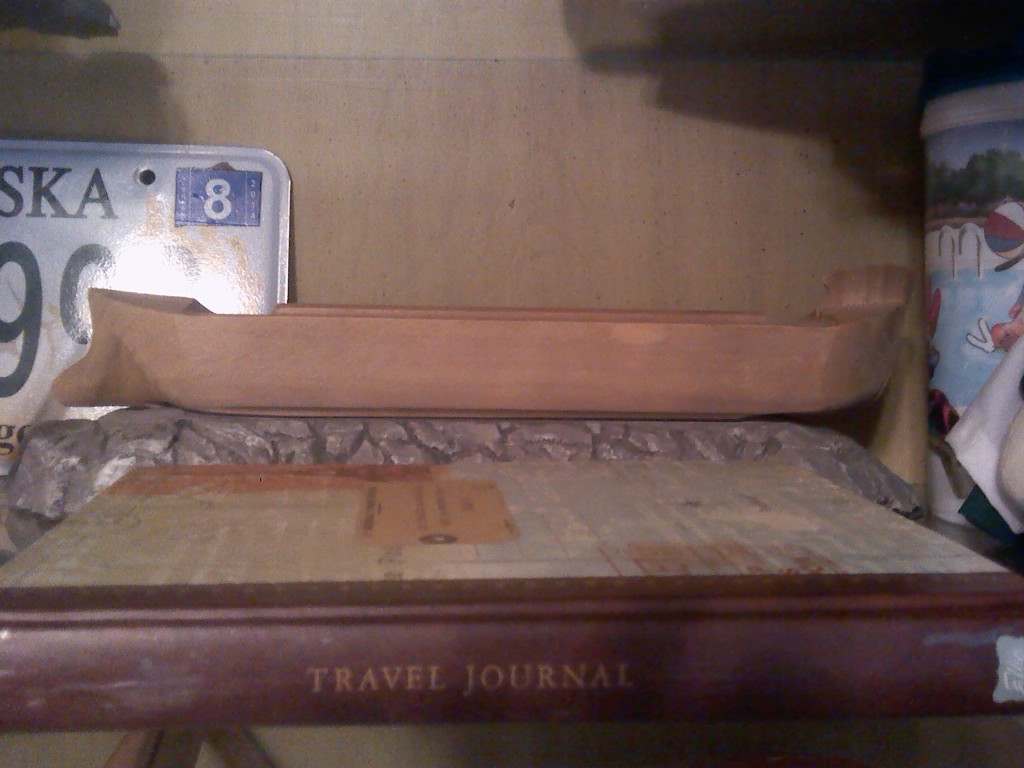
I got a few mementos from this trip, mostly free. I wrote in my journal every day. I pressed a flower in its pages. I brought my National Parks passport so I could add a Haleakala stamp. And of course I took lots of pictures!

Toward the end of our trip we went to Lahaina, which was a good place for shopping. There were fairly good prices at ABC Stores, where I got chocolate covered macadamia nuts and a bracelet. Out of respect for preserving the natural beauty on Maui, I did not smuggle out any coral, sand, or rocks.

Maui did end up costing more than my typical frugal trips, but we were able to have a good time without breaking the bank. I hope you’ll be able to enjoy Maui on a budget, too!

How to Vacation in Maui on the Cheap

How do you lower the price of an expensive destination? Let me know in the comments!

resources, souvenir, travel tips

Lake Livin’

This summer I found what may very well be my new favorite company. They make products that have made my travel life and even my home life better on a day-to-day basis. They’re called Lake Livin’ but I’ve taken their products to the pool, to the bay, and even to places that don’t even have bodies of water!

It all started a few months ago when I dropped my phone in the toilet. AGAIN. Most of the phones I’ve owned have been lost due to some sort of water damage. I tried to dry it out and keep it overnight in rice, but since I had already cracked the screen last year while backpacking in Thessaloniki, there was no hope. I used this opportunity to get a phone upgrade. Later on, I went to Eddie Bauer and discovered that they had waterproof phone cases on clearance. I bought one, but it was impossible to use my phone while it was in this case. I’m so glad I found Lake Livin’, because their phone bag keeps my phone safe while still being able to call, text, take photos, and browse the internet!

But it takes more than one product to make a good company.

Ever since getting my new car, I’ve enjoyed exploring more places. The problem is I didn’t have a good place to set my GPS. I wanted to keep it next to the clock, but it slid off too much. The Lake Livin’ non-slip dash mat has been like having an extra set of hands in my car! I mostly use it to keep my gate opener in place because I have a hard time finding anywhere else, and also for my GPS when I use that.

Whether at home or away, the Lake Livin’ ringer tee has been pretty awesome to me. The first time I wore it, I actually got compliments about it from someone waiting in line behind me in the store! One of the places I recently wore my Lake Livin’ tee was on my trip last week. One morning I took pictures with it in the back of my hostel. Can anyone guess where I was?

DSCF5364

day trip, geography, hike, saving money, souvenir, travel tips

Two Days, Two States, Two National Park Sites!

It has been quite the weekend! In addition to Earth Day on Friday  and celebrating the entire weekend with Earth Day-themed posts, I was out celebrating nature as well! Just between yesterday and today, I took two trips, both to National Park Service sites. And one of them even called for hopping the border between Oregon and California!

Saturday: Lava Beds National MonumentDSCF5020

For several weeks, my friends and I have planned to go on a trip to Northern California this Saturday. We were supposed to go to the Redwoods, but people and plans changed, so my friend Steph and I made a last-minute switch and headed to Lava Beds National Monument instead, which is east of the Redwoods in Northern California. Although both of us had been here many years ago, with the length of time since our last visits and flying by the seat of our pants, we weren’t sure what to expect. Yet we left incredibly impressed with all that there was to do!

DSCF5016

  • We admired all the volcanic rock we passed on the way in the monument.
  • We watched an informational video at the Visitors’ Center about the history of the lava tube formation and American Indian tribes that were forced out of this area.
  • A park ranger taught us about the white-nose fungus that is killing bats and quizzed us on our past caving experience to see if any of our clothes needed to be decontaminated. Once we passed, she gave us a caving permit.
  • We drove around the Cave Loop and stopped at any caves that were open. (Some were closed to protect the bats living inside.)
  • Since caves are 55 degrees year-round, I was glad I had left a coat in my backseat! We ended up getting warm from all the exercise we did, anyway.
  • Although the Visitors’ Center loans out free flashlights since battery-powered lights are required to enter the cave, we decided to use our cell phone flashlights just so we’d have one less thing to lug around. I learned that my phone flashlight turns on and off by shaking it. Typically I might think that was convenient, but it wasn’t so helpful when I stumbled around caves!
  • One of my favorite cave names was called “Hopkins Chocolate”, which is named because some of the lava coating inside looks like dark chocolate is dripping down the cave walls!
  • There were other neat-looking things in other caves. Some of the caves had what looked like moss growing on it. (Not sure if it was something living or just the way the rock was colored.) When scattered among the dripping moisture creating stalactites, shining a flashlight on it makes the green specks look like fool’s gold, and the white looks like specks of silver!
  • The next time I go, I’ll probably want to bring a helmet, a headlamp, and maybe gloves so I can go further into some of the lava tubes. Since we weren’t equipped, we decided not to go anywhere that required crawling, but there were quite a few areas that involved ducking down!
  • There were some nice places to walk, too! Both Steph and I really wanted to hike up Schonchin Butte, a .7-mile uphill trail that leads to a fire lookout. The lookout itself is closed for the season until tomorrow, but we got some great views!
  • Although there was so much more we could have done, we decided that the last activity for the day would be to walk around Captain Jack’s Stronghold. This was an area where the military fought against the natives to force them out of this area. Although the history is sad, it was neat to see some of the rock structures that they built that are still standing today.DSCF5028

Sunday: Crater Lake National ParkDSCF5042

I had so much fun on Saturday, I decided to continue the National Park and volcano-themed weekend my closest National Park, Crater Lake. Since this wasn’t as long of a drive, I decided I could make it to church (although I did attend the 9 am service instead the 10:45 service I normally go to), and then head out. With only slightly more planning today than yesterday, I ended up going alone this time. I went to Crater Lake almost exactly a year ago, and it was so odd to see how different it looked this year!DSCF5031

  • It was already a rainy day, and I was praying that it wouldn’t rain while I was at the park. That prayer was answered, but not in the way I expected! As I crossed the park boundary line, I noticed that all the trees were covered in snow. In fact, it was actively snowing most of the time I was there! It’s late April!
  • My first stop was the Visitors’ Center, where I watched the video about the surrounding nature and how Crater Lake was formed by a giant volcano eruption followed by years of collected rain and snowfall. I had to enter and exit the Visitors’ Center from the side entrance because the front entrance was covered with snow all the way up to the roof!
  • I then drove up to Rim Village (being careful in the Avalanche Zone), and parked next to the lodge.
  • After browsing the gift shop in the lodge, I went up to the top floor, which is supposed to have an observation window. Maybe it works on clearer days, but with all the snow and clouds, it was impossible to see the lake from here! Instead I read the museum-style informational signs.
  • I decided that the only way I would have a chance at seeing the lake was to walk through the snow myself. Fortunately, I still had my coat in the back of the car, although I definitely would have benefited from more winter gear!
  • I followed the others who were also outside to the farthest point that could be reached without crossing the safety line. As I looked out, I could barely see Wizard Island, the large island in Crater Lake. After a few minutes in the cold, the air cleared up for some precious seconds where we got to take pictures. It still didn’t display the bluer-than-blue color I’ve seen on sunnier days, though!
  • I warmed up in the lodge for awhile longer, when a park ranger told me to look out the window. You could barely make out part of the back rim, but he said that was the clearest it had been all weekend. Yesterday they basically couldn’t see the lake at all!
  • I went out to the safety line for one more photo shoot, but then decided to turn back and head home. In the summer you can usually drive around the whole lake, but since it snows year-round at Crater Lake National Park, they limit their snowplowing in the winter to only the roads to the South Entrance, Visitors’ Center, and Rim Village.
  • On the way back, I stopped for a short walk by Union Creek. My family used to go camping there when I was a kid. I walked by the Rogue River Gorge and saw the Living Stump!
  • My family had a dinner all together tonight, and since I knew my sister had gone to Crater Lake National Park last weekend, I asked her how well she could see the lake that day. She looked at me confused as she told me it was a perfectly clear day and that many of the visitors were wearing shorts! It’s funny how much the weather can change from one week to the next!DSCF5036

Where to Next?

Hmm…good question! I had been admiring the National Parks Passport for some time now, and finally decided to purchase one at Lava Beds National Monument. This is an informational book about all the National Parks in the United States. Every time you visit a National Park, Monument, or Historic Site, you can get a page of the passport stamped. Since I knocked out two parks in just this weekend, I already have two stamps! Now it will be used as encouragement to visit more National Parks.

The Oregon Caves National Monument is fairly close to me, so I may go there sometime soon. Of course, we need to reschedule our trip to the Redwoods that we had originally planned for Saturday! Although we were going for the Trees of Mystery and the Tour-Thru Tree, I can stop by a Redwoods National Park center for a passport stamp.

Although I would love to become a National Parks junkie, it was really only financially possible for me to visit two National Parks in just one weekend because it was part of National Park Week, and the National Park Service allowed all parks and monuments to have free entrance. Normally Lava Beds and Crater Lake each have a $15 entrance fee per car. I would definitely love to take advantage of the upcoming entrance days in August, September, November, or any of the other free days listed here. To save money on National Parks in the future, I may consider getting an annual pass (I can’t wait until I’m 62 and can get the discounted lifetime pass!), or I may try to find out which of my friends have a fourth-grade child, since a car with a fourth grader in it can enter National Parks for free! Some National Parks and Monuments are always free, which thankfully, the Oregon Caves and Redwoods both fall into the free category!

Accommodations, Carry-On Toiletries, culture, Foodie, health, resources, souvenir, travel tips, voluntourism

Traveling Can Be Green, Too!

Happy Earth Day! Most of what I write here is creative ways to travel that will save you green. But in honor of today’s holiday, I’m going to shift gears a bit and talk about another way to save the green.

Many environmentalists frown upon travel as it causes greenhouse gases and a bigger carbon footprint. True, carbon costs associated with travel can be astronomical, but that doesn’t mean it can’t be cleaned up and greened up. Since Earth Day is celebrated each year on April 22nd, here are 22 ways you can make your travel more green!

(Bonus: In addition to saving the green for the environment, many of these will save the green in your wallet, too!)

Green Accommodation

South Dakota 004
Share your campsite to make an even lower impact!
  1. Stay in Hostels Staying in a hostel dorm with others requires less square footage and encourages community. Hostels also often tend to buy in bulk and cut out worthless amenities, so you won’t create excess waste with miniature shampoos.
  2. Go Camping Get in touch with nature, and then be encouraged to preserve it! Any kind of camping is probably helpful for the environment, but you can take it a step futher with primitive camping, where you won’t have electricity hookups, WiFi, or possibly even flushing toilets!
  3. Stay with Friends Instead of creating a demand for a temporary place to sleep, go somewhere that’s already being lived in. Your friends will probably equip you with the same shower, dishes, and bedding they always use instead of providing disposible or temporary supplies like a hotel does.
  4. Don’t Request Sheet Changes Unless Absolutely Needed In your own home, you probably realize that washing sheets from just one bed is enough to load an entire washer and dryer. Save the water, soap, gas, and electricity by skipping sheet changes. You don’t replace your sheets at home every day, do you?

Green Packing

wpid-img_20151021_111935_250.jpg
Unless you need a Delorean because you’re going on a time-travel vacation, don’t pack enough to fill a truck.
  1. Bring Your Own Toiletries in Reusable Containers I’ve shared some of my favorite travel toiletry containers here before. Whether you use my recommendations or not, siphoning toiletries from bulk containers into smaller, reusable containers is much better than purchasing one-time bottles from the travel section of superstores.
  2. Lighten the Load with Carry-On Only No matter which mode you travel with, you’ll always save fuel if you take a lighter load. I backpacked the Mediterranean for 92 days with just a carry-on! I think going on a weeklong vacation with only a carry-on is a piece of cake.
  3. Borrow or Buy Used Travel Gear There are some items that may be necessary while traveling, but useless in everyday life. If you absolutely cannot go without it, ask your friends, family, and social media followers if you can borrow their tent, or ice chest, or lawn chair, or… you get the picture.
  4. Do Laundry Effectively If you need to do laundry on your trip at all, first see if there is anything you can wear more than once between washes. Bring your own eco-friendly soap instead of the single-serve packets found at the laundromat, and try to line-dry your laundry, even if you have to do so indoors.

Green Transportation

Rafting
You could travel by boat for a really fuel-efficient getaway. But if going by raft, you may get wet!
  1. Carpool If someone else is available to travel with you, going in one car instead of two will cut your emissions in half. Better yet, if you’re both licensed drivers, split the driving time to help keep alert and avoid accidents.
  2. Take the Bus or Train I love both of these options! You get to see so much more of the country, and reap the benefits of extremely low passenger miles per gallon! Trains are often a vacation in themselves, and long-distance buses make travel available to all income levels!
  3. Walk or Bike Everywhere at Your Destination Make a point to do this everywhere you go, even if it means staying closer to the city center. I can’t imagine all that I would have missed out on if I took cars or city transportation everywhere I’ve been.
  4. Don’t Fly First Class I’ve flown first class one time, and it was WAY overrated. Flying in coach means that the seating allows for more passengers to fly (and thus cuts down on emissions per person), plus lowers the waste of beverage cups and snack wrappers.

Green Eating

Laduree
My take-away container was already full when I bought these in Paris. But I could recycle the cardboard and bag!
  1. Pick Restaurants that Serve Local Food You’ll get a better sense of the local cuisine and prevent excess trucking and shipping of food.
  2. Become a Vacation Vegetarian I’m not saying you have to give up meat. (Not everyone can!) But try to select veg options in your travels. Besides the environmental advantages, vegetarian options often cost less, and you will be less exposed to those icky stomach bugs that travelers fear.
  3. Bring Washable Dishes or Stay Somewhere that Offers Them It’s not that time-consuming to wash your dishes after eating instead of throwing them away.
  4. BYOB (Bring Your Own Bottle!) Vacations tend to make me thirsty! Instead of buying drinks everyday, I’m saving my wallet, my waistline, and the Earth with a reusable bottle.

Green Entertainment

Love Locks Paris
See those love locks at practically every major attraction? Skipping this activity will reduce the waste of the lock and packaging, reduce the pollution caused when the key is tossed into the water, and reduce the repairs needed on the structures that are getting vandalized and weighed down!
  1. Recycle Ticket Stubs (or Use an eTicket) These are usually recyclable, but rarely do people think to recycle them!
  2. Visit Local Parks Fresh air, green plants, and a free place to explore the local culture. What’s not to love?
  3. Borrow Books or DVDs for Downtime Sure, you could buy a paperback for those times you need to relax. But many hostels, and now even some hotels, offer lending libraries or book/movie exchanges. Reduce the demand for new materials, and lighten the weight of that carry-on you brought!
  4. Visit Ethical Attractions What you define as “ethical” is ultimately up for you to decide, but consider how workers are treated, how animals are used, how waste is disposed of, and how guests can contribute to the community.

Green Shopping

075
Arnold Schwarzenegger bought this bear statue as a souvenir of his time as governor, but then left it at the California State Capitol! I guess he couldn’t even fit it into his suitcase.
  1. Avoid It Why do you need a tacky souvenir (that’s probably not even made at your destination), when there are more effective, and more eco-friendly, ways to capture your memories? One of my favorite mementos are my travel journals. Photos are another great option, or if you absolutely want to buy something, send yourself a postcard or letter from your destination.
day trip, destinations, geography, hike, road trip, saving money, souvenir, travel tips

Glass Float Treasure Hunt

This past weekend, I was finally able to get some real use out of my new car! Sure, I’ve taken it to work and to run errands, but it’s about time that it got to go somewhere fun out of town. And for about sixteen dollars in gas (which was the only expense of this trip), my friend and I were able to spend a fun and adventurous day looking for glass floats in Gold Beach, Oregon.

12795063_10154039312433783_2294133375615448373_o (1)

Last year, I saw a TV ad from Gold Beach tourism. They announced that every week between February and April, they hide over 100 glass floats along their coast for visitors to find. If you find one, you get to keep it AND enter a drawing for a free weekend trip! I wasn’t able to make it out to Gold Beach last year. However, after deciding to buy my car this month, I began coordinating schedules with friends to find a time to head out to the coast. Steph and I both had time off this past weekend! (She was even the photographer of all these images because I forgot my camera and my cell phone was acting up over the weekend.) We headed out on Saturday morning.

My car’s maiden voyage was a success. I learned a few new things about it, like where to pop the gas door, how to play music through the stereo with an auxiliary cable,  and how to spray wiper fluid on the front windshield. The drive to the coast is beautiful. There actually isn’t a direct route west to the coast. Directions to Gold Beach led us into California and through the Redwood Forest before heading back up along the coast, which always makes for a beautiful ride. Along the way, we saw lots of interesting things that we made note of to stop by on the way back.

It was past lunchtime by the time we made it to the coast. We considered the restaurant options, but decided to just eat what we had packed. We parked at the Gold Beach Visitor’s Center, which has a picnic area, bathrooms, and an information building. Inside that building, we were given a map outlining the perimeters for where the floats were placed. After eating, we started traipsing through the tall grass. We figured it was most likely in this area, because the tide covered most of the sand, and floats are not hidden anywhere that would cause them to be swept into the ocean. We looked under driftwood, in holes, and between rocks, to no avail. We saw other people searching, but no one who actually had found a float. After this hunting method resulted in only finding garbage, we decided to walk down to the jetty, which was a boundary on the map. We hoped that the further away we got from the Visitor’s Center, the more likely we would be to find something.

On the walk there, I had to mentally prepare myself for disappointment. I knew the chances of us finding a float were slim, so I considered the alternatives. If we gave up, we could go shopping at some of the stores in town. If we spent at least $25 at certain stores, we just had to bring the receipts in to the Visitor’s Center and get a glass float from there. But that didn’t sound like as much fun as finding one on the beach for free. Fortunately, a glimmer of red caught my eye. It was a glass float!

12440800_10154039311713783_2881019246664324017_o (1)

Not only did I find a glass float, but we ended up finding several all within a few minutes! The treasure hunt rules ask participants to only take one per person, so we left a few of them for others to find. Steph ended up with a small teal globe. I picked my favorite, a larger blue one. We slowly headed back to the Visitor’s Center (stopping to admire the beach and shoot photos on the lighthouse). The staff at the center told us that they were impressed that we were able to find even one that day as we filled out our contest entry forms.

It hadn’t seem like we walked that far (until the next day when my legs were sore), and it also didn’t seem like we had been beach combing for that long. But we had walked several miles, and were out for about three hours! I didn’t realize this until we hopped back into the car and saw the clock saying it was 4:30. But we still had enough daylight to see the things we wanted to see on the way back.

12747932_10154039316733783_2741029845922871646_o

We didn’t stop in the nearby coastal town of Brookings, but as we drove through it, we got a good look at the sinkhole that’s slowly taking over the highway. That was pretty scary! We also drove over Oregon’s highest bridge and saw a huge herd of wild elk. Our first actual stop was near the redwoods, on a nature trail with carnivorous plants called Darlingtonia (pictured in the marsh above).

12764757_10154039320383783_5044618060661753712_o

The second stop was just a couple of miles down the road at a waterfall. I would tell you what this waterfall was named, or really any information about this waterfall, but I can’t. There were no signs or plaques, so it’ll just be called “The Waterfall We Saw On the Way to Gold Beach”.

12792175_10154039330458783_3683189505727718052_o

There were several other places worth seeing through the comfort of the car window. If you’re visiting from further away, some of them may be worth stopping at, but we’ve grown up with the sights of the giant redwoods and the mountain roads that twist, turn, and tunnel.

12029760_10154039339843783_3718692029023249501_o

While I’m not sure if we’ll be so fortunate in each finding a glass float in the future, I do hope to do this again and encourage you to try it out, too! Click here for more information on Gold Beach’s annual three-month treasure hunt!

Books, culture, destinations, resources, souvenir, travel tips, writing

What to Expect with a Letter to Juliet

DSCF3982

Before even watching the movie “Letters to Juliet”, I was excited to go to Verona as part of my Mediterranean Trek. So I planned out my visit to this city mainly by borrowing the movie from a friend. The only mistake I made was that I booked a mere two nights in Verona, leaving me with just one full day to experience all that this quaint city has to offer.

DSCF3930

My first night in Verona was spent arriving by a delayed train, then struggling in the dusk to find where my BnB was before finally giving in and taking a cab, so I didn’t see much in the midst of that stress. I started the next day bright and early with a walk to Juliet’s courtyard. This is what you see in “Letters to Juliet“, and it’s the perfect place to write a letter to Juliet! Because I got there early enough, there were only a few other people there. I found a quiet place by the grafitti wall of love to write my letter. In the movie, you can see women sticking their letters into the cracks of a wall. You can still do that, however, to make sure that a secretary of Juliet receives your letter, there are better practices in place now. The best thing to do is stick your letter in the red mailbox. Alternatively, if you go inside the house, you’ll find computer kiosks where you can e-mail her!

DSCF3929

I wasn’t sure if I wanted to go inside the house at the time, so I headed over to the area where you can find Juliet’s tomb. It turns out that you can get a discount by getting a combination ticket to Casa de Giulietta and the museum with her tomb, so I did that. The tomb was the best feature of the museum it’s housed in, but there are other art and artifacts to enjoy as well.

DSCF3943

I eventually went back to the house, Casa de Giulietta. Inside were a lot of artifacts from some of the Romeo and Juliet movies, such as costumes and a prop bed.

DSCF3950DSCF3949

But the best part of the Casa was getting to stand on Juliet’s balcony, and pondering “Wherefore art thou?

DSCF3953

While foot traffic inside the Casa wasn’t so bad, the courtyard was getting jam-packed with tour groups and other visitors. Here’s a tip: If you want a truly magical and meaningful experience with Juliet, go in the morning before the day trippers roll in!

DSCF3951

I went to the courtyard for a third time in the evening, and it was even more crowded then! But this is when I enjoyed putting my own graffiti on the wall entering the courtyard. I’m not a vandal, it’s actually encouraged!

DSCF3999

In another spot of the courtyard is the only place in Europe where it’s actually encouraged to place a love lock, as it will eventually become a part of an art piece. (But seriously, don’t put a love lock anywhere else! I saw locks on every fence and bridge in every city I went to, and it just looked inconsiderate and trashy.)

DSCF3998

There are a lot of other things to do in Verona, such as go to the Arena, walk by the river, or explore the castles. I did some of these things, but since none of them are directly related to Juliet, I’m going to fast forward to today.

DSCF3937

I had heard it would take a long time to get my letter back from Juliet. I was hoping it would arrive to my house around the time that I came back from the Mediterranean, but such was not the case. I kept it in the back of my mind, and thought about it sometimes when I went to get the mail. But today, I was totally not expecting it!

I opened the mailbox and grabbed the letters out. One had an Italian postmark, and the return address said it was from “Club di Giulietta”! I squealed in excitement. I scared my dog by my squealing. I hope the neighbors didn’t hear me squealing. I raced back to the house so I could carefully open the envelope.

12670552_1292889524071431_2308163244288066120_n

I don’t remember exactly what I wrote to Juliet, but it was a decent-sized letter that could be summed up as “where is he?” I was honestly just expecting the response to be a canned sentence on an index card. I was surprised at how much thought was put into the letter I received! Here are a few of my favorite quotes from the letter.

“Finding love isn’t easy. In fact, it should be something they teach in school along with how to manage your finance and finding a job that you like.”

“Some people fall in love quickly- others warm to it slowly. But there is one common thing about it- that love doesn’t happen if you don’t take action.”

“Take the plunge- and live it, not dream it.”

By the way, while I would definitely encourage a trip to Verona if you can, you don’t need to go there in order to get a letter from Juliet. Just send your letter to:

Club di Giulietta
Corso Sant’Anastasia, 29
37121 Verona, Italy

In an age where it’s rare to receive a beautifully handwritten letter, it’s even more special to receive one from a fictional character!

Letter from Juliet

resources, souvenir, travel tips, writing

Top Ten Tips for Taking a Travel Journal

image

For many of my past trips, I have taken along a travel journal. But will I take one on this upcoming trip? Journals are heavy, and three months is a long time to keep consistent in writing. But my new travel journal will not leave my side as I trek across Europe! If you are planning a trip, I have some advice as to why you should include a journal.

1. My journals are the most meaningful mementos of any travel. They remind me of many emotions and experiences that I may have otherwise forgotten, whereas souvenirs often only remind me about my experience at the shop. Plus, since you bring your travel journal at the beginning of a trip, it’s the only souvenir that won’t add pack weight as you go!

image

2. If you aren’t into writing, don’t assume journaling isn’t for you. Some journals come with unlined pages, perfect for those who prefer to doodle. You could also have others write your journal for you. Just ask those you meet on your trip if they would leave a note in your book so that you can remember them. My journal has a pocket in the back cover that I use to collect notes, tea and candy wrappers, ticket stubs, and other small mementos. Some travelers bring a glue stick along with them and use these sorts of items to create an on-the-go scrapbook in lieu of a journal.

3. Don’t feel pressured to write every day. On transport days, it’s hard to come up with an entire page of how interesting it is to sit on a bus. I’ve often combined two travel days into one journal entry (often a busy day where I didn’t have time to write followed by a boring day of just getting to the next place). I still include the slow days in my journal because they’re still part of my journey and usually something notable happens, but you can skip days like these entirely if you choose.

4. Decide if your journal pages will be shared, or if they are for your eyes only. I never really thought about this until last summer when I was speaking with a Japanese traveler who wanted to practice his English. When he asked to look at the journal on my lap, I hesitated, but figured that he wouldn’t be able to understand most of it, and I was never going to see him again anyway. Since then, I have shared a few entries on this site, but I think many entries only display their full meaning to the one who wrote it.

image

5. Remember that there is no pressure to fill up every page of your travel journal. My most recently used journal is filled with trips from the past several years (2009-2014), and it still has some pages to go. I actually like the blank pages at the end. They’re inspiration for future trips. Or you can leave those last pages eternally blank and start a new journal every trip.OR, you can turn your travel journal into a daily journal and write about your adventures at home. It is your journal, so do with it whatever you want.

6. This may only be for people like me who can’t stand improper spelling, but when you look back on your entries, resist the urge to correct any errors. that journal entry was written in its time just the way it is, and trying to change that is like trying to change history. Leave it be! That being said, when you are writing in your journal, make an effort to use proper spelling, grammar, and punctuation. Your future self will thank you for it!

6. Use your journaling time to relax from your journey. I often incorporate journaling into my on-the-road bedtime routine. I’ve also journaled at a park or other place where I can write while lingering by a view. Having a journal is also a good way to look less creepy when people-watching. If someone looks your way, simply get really involved in your writing!

7. I try to bring along a medium-sized journal because it’s big enough to hold everything I want to write, but still light enough to carry around. I sometimes even carry it in my day pack when I go walking for the day. That way, it’s ready to go whenever or wherever I’m inspired to write.

image

8. You can use your journaling time to also practice your faith. You could write a prayer journal if you desire. My last two journals have had scripture pre-printed on each page. Sometimes, when I get out my journal, I’ll also get out my Bible as well. Journaling tends to mentally and spiritually place me in a position where I am very open to prayer and meditation. Find out what works for you.

9. Back when I was in high school, for the few trips I journaled for, I just used a spiral notebook. I guess it served its purpose, and I still have those stored, but they’re definitely lacking something. I would say the same thing about computerized journals as well. Beautifully laid out pages make the writing experience more enjoyable. A ribbon bookmark helps you keep your place. And a hard cover makes a journal durable for any trek it comes across. I got all these features when my grandma gave me an Ellie Claire travel journal. I have used it over the past several years, but when I realized I was running out of pages for my upcoming trip, I went straight to Ellie Claire for another one! My new journal has an updated look, but still includes all my must-have features!

I still need a tip number ten! Do you keep a travel journal? What advice can you share?

image

Thanks Ellie Claire for sponsoring my new travel journal! All opinions expressed are my own, and I was loving Ellie Claire long before they partnered with this website!

souvenir, Travel Journal Tuesdays, writing

Travel Journal Tuesday

A little over five years ago, my grandmother gave me a travel journal. I had previously kept some sort of documentation for some of my travels. During my first mission trip to Peru, I had brought along one of those cheap spiral-bound school notebooks where I wrote about my thoughts, feelings, and activities of each day. I don’t know where that journal is anymore. When I started my first job by the Pacific Coast, I was diligent to journal for each of my thirty-three days of employment. Again, it was a not-so-special spiral-bound journal. I don’t know where that journal is anymore, either. When my tenth-grade class flew to the East Coast, our tour company provided everyone with a colorful booklet with blank lines and writing prompts. I normally would have loved to use something like this, but since we had to turn it in to be graded, I may have been a little snarky and short in what I wrote. I don’t think I even finished filling out that journal, and its possible that it was destroyed after my teacher read it. I really don’t know where that journal is anymore! Even as far back as elementary school, I recall that my second-grade teacher gave us her handmade journals so we could write and draw about our adventures during school holidays, plus anytime we were taken out of school for a vacation (such as my first trip to Disney World). I’m sure my mom has those memories stored somewhere, but I don’t know where that journal is anymore!

Travel Journal Cover

But when I received this beautiful travel journal, I knew right away that this would be superior to all previous travel journals. I initially used it to record my experience on my 2009 mission trip to Peru. Since then, I’ve taken it along to recount my days on my 2010 Northwest choir tour, my mission trip to Mexico, my backpacker vacation to Tennessee, my international trip to Niagara Falls, and my bus ride across the country. And I know exactly where this journal is. It’s the centerpiece of one of my travel-themed shelves!

Travel Memento Shelf

I don’t write in my journal for every trip I take. For weekend trips and other trips where I try to cram too much in too few days, I believe its a better use of my time to go out and experience as much as I can instead of taking a break to write about it. I also haven’t kept a journal for any trips that are primarily focused on working, such as camp conferences I’ve attended. I don’t think it would be interesting to read my journal years later about how I sat in meetings for most of the day. I memorialized these sorts of trips in different ways, such as photography, videos, or blogging. (If you visit The Rivercrester, you can read about almost everything I did while living in Nebraska, from the cool trips that I took to the times I was stuck at camp and only wishing that I could travel!) I don’t really have a criteria for which trips are worthy of my travel journal, but it’s treated like a near-sacred relic, so I use it for the trips that I feel are the most important.

This journal has a great layout, including a bookmark, a secure band, and a pocket inside the back cover to hold small mementos. Each page has plenty of room to write, plus an extra box to emphasize my highlight of the day. I also really like that each page has both a travel quote and a travel-themed Bible verse. It’s almost like having a mini-devotional each day of travel. I can usually fit everything worth mentioning about one day on one of these pages, but on some of the more mundane days (like all-day transit or staying at someone’s house), I can fit two days on one page. There have even been days that were so full of events and emotions, it was a challenge to fit everything even on two pages!

Travel Journal Entry Page

I had never really considered whether or not my journal was suitable for sharing. It wasn’t until a few months ago when I was journaling in the commons area of a Canadian hostel. A Japanese guy sat down next to me, and attempted to make conversation as a way for him to learn English. When he noticed the book on my lap, he asked if it was a diary. Then, he asked to read it! I handed it to him, and maybe it was because I was pretty sure he wouldn’t understand most of the content, but I felt okay with letting him look at it.

After thinking about that ever since starting this website, I decided that I am comfortable sharing the contents of my diary with the internet-connected world. I may change names to protect the innocent or remove pieces that don’t make sense outside the context of my own mind, but I’m willing to be real and unfiltered. So starting next Tuesday, I will have a “Travel Journal Tuesday” where I will post a journal entry every week until I run out. Even though my journal’s only halfway filled right now, I have enough entries to last until at least next summer! Enjoy!

Do you keep a journal for any reason? How do you remember your travels?